Salads
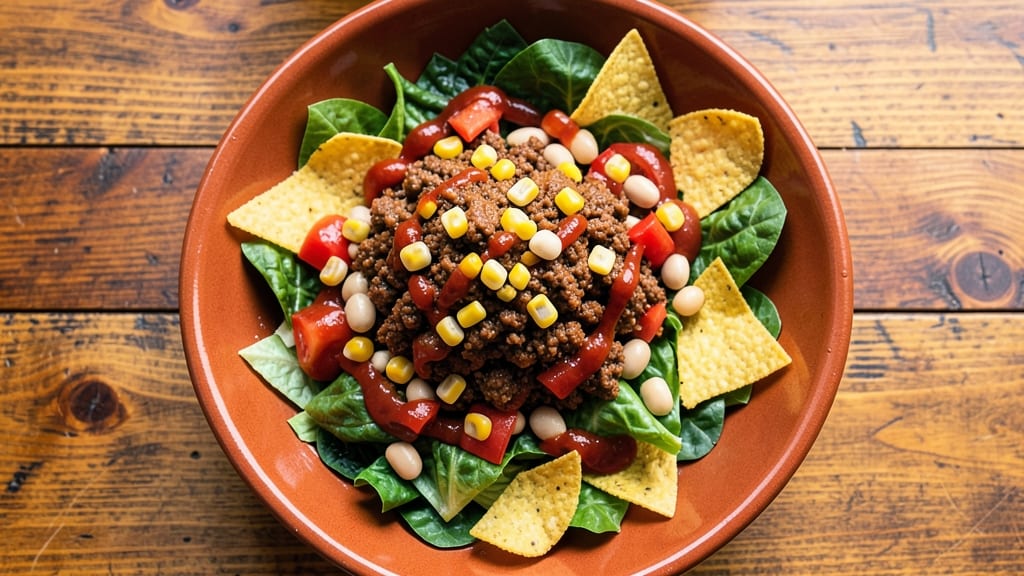
This chili taco salad recipe transforms a simple meal into a crispy, layered fiesta that delivers restaurant-quality flavor in one bowl. The foundation starts with a rich, spiced chili base—ground beef and beans simmered with cumin, chili powder, and garlic—that builds deep, smoky flavor while staying tender.
What sets this apart is the crispy tortilla chip topping, baked until golden and sprinkled with melted cheese for that perfect crunch you can't get from store-bought chips.
The assembly is where the magic happens: a sturdy bed of romaine lettuce holds the chili, while black beans, corn, and diced tomatoes add freshness and texture. Top it with the crispy chips, avocado slices, and a dollop of sour cream or Greek yogurt for creaminess that balances the heat.
This isn't just a salad—it's a complete meal with protein, fiber, and bold flavors that come together in minutes.
What you'll end up with is a dish that's hearty enough for a weeknight dinner but impressive enough for guests—layers of warm chili, cool avocado, and that addictive crunch from the homemade chips.
The best part? Every bite delivers a perfect balance of textures and flavors, making it a go-to recipe for those nights when you want comfort food without the fuss.
Perfect for meal prep or a last-minute dinner, this chili taco salad keeps well for up to three days in the fridge, with the chips staying crispy if stored separately. Serve with lime wedges on the side for a bright finish that cuts through the richness. Let's get cooking!
Ingredients for chili taco salad
Sixteen ingredients for a fiesta in every bite—crispy, cheesy, and packed with smoky chili flavor.
| Ingredient | Amount | Notes |
|---|---|---|
| Ground Beef (80% lean) 🥩 | 1 ½ lb | Brown and drain fat well |
| Black Beans 🌱 | 1 ½ cups | Rinsed and drained |
| Corn Kernels 🌽 | 1 ½ cups | Fresh, frozen or canned |
| Romaine Lettuce 🥬 | 1 head | Chopped into bite-sized pieces |
| Diced Tomatoes 🍅 | 1 ½ cups | Fresh or canned, drained |
| Tortilla Chips 🍟 | 6 cups | Crushed for even baking |
| Shredded Monterey Jack Cheese 🧀 | 2 cups | Mild and melty preferred |
| Avocados 🥑 | 2 whole | Ripe, sliced into chunks |
| Greek Yogurt 🥛 | 1 cup | Plain, full-fat preferred |
| Lime Wedges 🍋 | 2 whole | For serving, freshly cut |
| Chili Powder 🌶️ | 2 tbsp | Smoked or mild variety |
| Ground Cumin 🌿 | 1 tbsp | Toasted for deeper flavor |
| Garlic Cloves 🧄 | 4 cloves | Minced for maximum flavor |
| Olive Oil 🫒 | 2 tbsp | For crispy chips |
| Salt 🧂 | 1 ½ tsp | Kosher or sea salt |
The ground beef is where the deep, smoky flavor starts. 80% lean gives you that perfect balance of richness and tenderness—90% lean can get dry. I always grab mine from the meat counter at Kroger or Walmart because it's cheaper than pre-packaged. Brown it well, drain all that fat, and you're golden. The black beans? Rinse them—no one wants mushy beans in their salad. For the corn, frozen works just as well as fresh—just make sure it's fully thawed before mixing. The romaine lettuce needs to be crisp, so pick the freshest head you can find—those outer leaves with brown spots? Toss 'em.
No ground beef? Lean ground turkey or lentils work great—just adjust the cooking time. Ran out of black beans? Kidney beans or pinto beans swap one-for-one. The tortilla chips are the star of the crunch department, so don't skimp on the Monterey Jack cheese—it melts beautifully and has that perfect tang. Avocados should be ripe but firm—press the stem, and if it gives just a little, it's perfect. For the Greek yogurt, full-fat gives you that creamy texture that balances the heat, but low-fat works in a pinch. The lime wedges? Freshly cut makes all the difference—store-bought juice just doesn't have the same zing.
This salad keeps beautifully for 3 days in the fridge, but the chips lose their crunch fast. Store them separately in an airtight container, and they'll stay crispy for up to 2 days. The chili base gets even better the next day—all those flavors meld together. I like to prep everything ahead of time: cook the chili, bake the chips, and chop all the veggies. Then it's just a matter of assembling when you're ready to eat. The lime wedges? Cut them right before serving—they dry out fast. Double the batch if you're feeding a crowd—this disappears quicker than you think.
Why You'll Love This Recipe
- One-Pan Magic: I swear by this recipe because it’s literally one pan—no chopping boards, no extra bowls. Brown the beef right in the same skillet you’ll later toss the beans and corn in, then just dump everything onto the lettuce. Minimal cleanup, maximum flavor.
- Texture Party: Crisp romaine, warm beef with that perfect sear, juicy tomatoes—honestly, I could eat this every day. The black beans add creaminess, while the corn brings sweetness that makes every bite feel like a little celebration.
- Lunchbox Hero: Between us, this is my go-to for meal prep. Pack it in containers with a sprinkle of cheese or sour cream on top, and it stays fresh for days. My kids grab these for school lunches, and I’ve even brought it to potlucks—no one ever guesses how easy it was.
- Budget Win: Ground beef stretches far, beans bulk it up, and corn adds freshness without breaking the bank. I’ve made this for $2 per serving, and it still feels like a restaurant-worthy meal. Leftovers? Even better—reheat the filling and toss with fresh lettuce the next day.
Step-by-step instructions for chili taco salad
Transform simple ingredients into a layered fiesta with crispy chips and bold flavors.
Cook the Chili Base
Heat the 2 tablespoons olive oil in a large skillet over medium-high heat. Add the 1.5 pounds ground beef (80% lean) and break it apart with a wooden spoon. Cook until the beef loses its raw color and begins to brown, about 5-6 minutes. This is where the deep, meaty flavor develops.
Drain most of the fat (leave about 1 tablespoon for flavor), then add the 4 minced garlic cloves, 2 tablespoons chili powder, and 1 tablespoon ground cumin. Stir constantly for 30 seconds until fragrant—this releases the spices' full potential. Pour in 1 cup water and bring to a simmer, scraping up any browned bits from the bottom of the pan.
Add the 1.5 cups black beans and 1.5 cups corn kernels, stirring to combine. Reduce heat to medium-low and let the chili simmer for 15-20 minutes until the flavors meld. Taste and adjust seasoning with the 1.5 teaspoons salt—it should be rich, spicy, and perfectly balanced. Let it cool slightly before assembling the salad.
Prepare the Crispy Chip Layer
Preheat your oven to 375°F. Spread the 6 cups tortilla chips evenly on a rimmed baking sheet, breaking any large pieces into smaller clusters. Drizzle with the remaining 1 tablespoon olive oil and toss gently to coat. Bake for 4-5 minutes until the edges start to crisp and turn golden.
Here's the thing—don't overbake. You want them just crispy enough to hold their shape but still able to soften slightly when layered with warm chili. Remove from the oven and set aside while you prepare the rest of the salad. If they cool too much, pop them back in for 1-2 minutes before serving.
Assemble the Layers
In each serving bowl or platter, start with a generous bed of the chopped romaine lettuce. This forms the fresh, crisp base that keeps the salad light and refreshing. Spoon the warm chili mixture evenly over the lettuce, creating a thick but not overwhelming layer.
Next, sprinkle the 1.5 cups diced tomatoes and 2 cups shredded Monterey Jack cheese over the chili. The cheese will begin to melt slightly from the heat of the chili, creating a creamy, gooey texture. Top with the crispy tortilla chips, pressing down gently to help them adhere to the other layers.
Add Fresh Toppings and Serve
Slice the 2 whole avocados into chunks and arrange them on top of each salad. The creamy avocado contrasts beautifully with the spicy chili and crispy chips. Dollop the 1 cup Greek yogurt around the edges or on top—it adds a cool, tangy element that balances the richness.
Finish with a squeeze of the 2 lime wedges over each serving. The bright acidity cuts through the fat and heat, making every bite more vibrant. Serve immediately while the chips are still crispy and the chili is warm. This salad tastes even better the next day as the flavors continue to develop!
Pro Tips For Making Chili Taco Salad
- CRISPY THE BEEF: Cook the ground beef in a dry skillet first—no oil needed—until it’s fully browned and broken into small pieces. Then add oil and spices to avoid a greasy mess (yes, even if it sounds counterintuitive). I learned this the hard way after dealing with a soggy, uneven chili base.
- DRY THE LETTUCE: Tear the romaine into bite-sized pieces and pat them very dry with paper towels before assembling. Wet lettuce turns your salad into a soggy bowl of soup—trust me, I’ve served it that way. A quick shake in a colander works better than you’d think.
- SAVE TIME WITH CANNED CORN: Skip the fresh corn—use canned or frozen, drained and rinsed, to cut prep time by half. Fresh corn kernels take forever to shuck and cut, and the texture difference in the salad is negligible. (Your future self will thank you.)
- SALT THE BEANS: Rinse and drain the black beans, then toss them with a pinch of salt before adding them to the salad. This balances their earthiness and prevents a bland, one-note flavor. I skip this step sometimes, and the dish always feels flat afterward.
Dietary considerations for chili taco salad
Gluten-Free Adaptations
This chili taco salad is naturally gluten-free if you use certified gluten-free tortilla chips and skip the flour in your chili base. I recommend La Tortilla Factory gluten-free chips—they hold up beautifully when baked.
For extra security, check labels on all spices and seasonings, as some blends contain fillers. The Monterey Jack cheese and Greek yogurt are also safe choices, but always verify packaging for cross-contamination warnings. 🌱
Dairy-Free Options
Swap the Monterey Jack cheese for dairy-free shreds like Violife or Daiya, which melt surprisingly well. For the creamy topping, use coconut yogurt instead of Greek yogurt—it adds a subtle sweetness that complements the spicy chili.
Just be mindful that some dairy-free cheeses can be overly processed, so taste as you go. The avocado and lime still shine as the star fresh toppings.
Low-Carb Modifications
Cut carbs by omitting the tortilla chips and using crispy roasted pork rinds instead—they add the same crunch without the gluten. For the chili base, use ground turkey or chicken instead of beef to reduce fat while keeping flavor.
The romaine lettuce and black beans provide fiber, but if you're strict keto, swap beans for cauliflower rice or shredded zucchini. The lime and Greek yogurt keep it light and satisfying.
Vegetarian Swaps
Replace the ground beef with crumbled tempeh or extra-firm tofu, seasoned with the same spices and browned in a skillet. For extra heartiness, add portobello mushrooms sautéed with garlic and cumin. The black beans and corn stay as-is, but boost protein with lentils or chickpeas. The flavor profile remains rich and satisfying—just
Allergen-Friendly Tips
For nut allergies, avoid any pre-made seasoning blends that might contain traces. For soy allergies, check your Greek yogurt label—some brands use soy stabilizers. If you're sensitive to nightshades (like tomatoes), use cucumber or bell peppers instead. Always prep ingredients separately to avoid cross-contamination, and keep a clean workspace when handling allergens. When in doubt, opt for single-ingredient toppings like fresh avocado and lime.
Nutrition facts
Frequently asked questions
Can I make this chili taco salad ahead of time?
Prep the chili base and bake the chips 1-2 days ahead—they’ll keep well in airtight containers. Store the chips separately to maintain crispness. Assemble the salad just before serving to keep the lettuce fresh. The flavors actually deepen overnight, making it taste even better the next day!
How can I make the chips extra crispy?
Bake them at 375°F for 4-5 minutes on a single layer, breaking them into small clusters. Toss with 1 tablespoon olive oil and sprinkle with a pinch of salt before baking. For extra crunch, broil for 1-2 minutes at the end—just watch closely to avoid burning!
What if I don’t have tortilla chips?
No problem! Use crushed corn chips, roasted pork rinds (for low-carb), or even toasted pita chips. For a homemade option, bake thinly sliced jicama until crispy—it adds a fresh, slightly sweet crunch. Just adjust the baking time to 8-10 minutes at 350°F for softer alternatives.
Can I make this vegetarian?
Yes! Swap the ground beef for crumbled tempeh or extra-firm tofu, seasoned with the same spices. Add portobello mushrooms or lentils for extra heartiness. The black beans and corn keep the dish hearty while staying plant-based. The flavor stays rich and satisfying!
How do I fix soggy chips?
If your chips lose crispness, bake them again at 350°F for 3-4 minutes until revived. To prevent sogginess, store chips separately from wet ingredients. For extra insurance, sprinkle them with powdered cheese or cornstarch before baking—they’ll stay crunchy longer!