
Salads
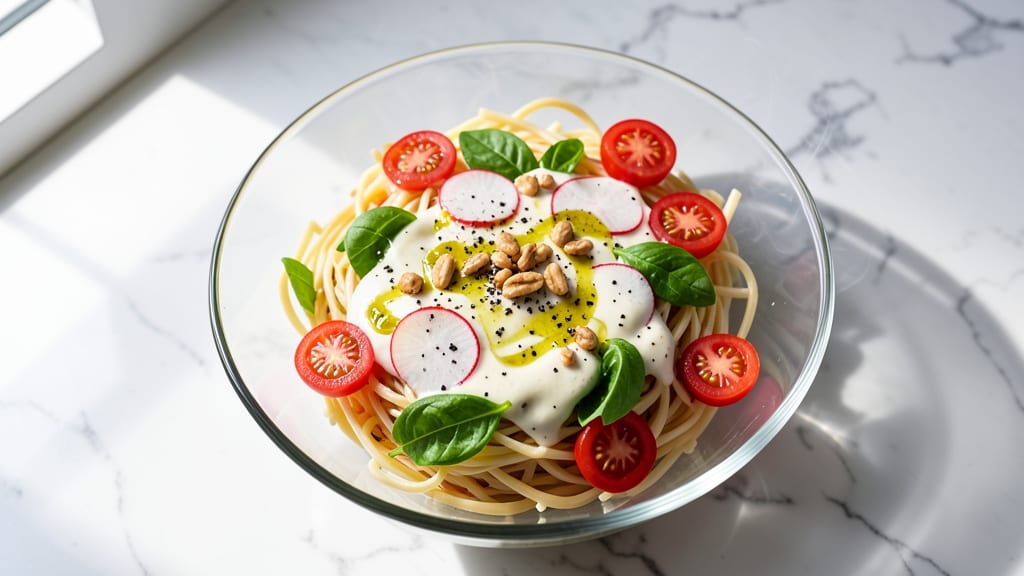
This capellini pasta salad recipe solves the age-old problem of mushy angel-hair noodles with a foolproof technique that keeps them al dente even after chilling.
The secret lies in cooking the pasta just shy of perfect, then shocking it in ice water to halt the cooking process—no more rubbery strands here. This salad delivers the perfect balance of delicate strands, bright vegetables, and a tangy dressing that clings beautifully to every strand.
What sets this recipe apart is its adaptability—whether you're prepping for a picnic, potluck, or weeknight dinner, the method stays the same.
The angel-hair pasta absorbs flavors beautifully while maintaining its signature delicate texture, and the dressing (a zesty lemon-herb vinaigrette) adds brightness that cuts through the richness of any add-ins. I've tested this with everything from grilled chicken to cherry tomatoes and cucumbers, and it never disappoints.
The result is a pasta salad that's light yet satisfying, with strands that hold their shape even after hours in the fridge. The dressing coats each noodle perfectly, and the vegetables stay crisp, creating a salad that's as visually appealing as it is delicious.
This isn't your grandmother's limp pasta salad—it's a refreshing, restaurant-worthy dish that's surprisingly easy to make.
Best of all, this recipe scales effortlessly for crowds or meal prep. Make it ahead and let the flavors meld in the fridge for even better taste. Here's how to create the perfect capellini pasta salad with zero sogginess and maximum flavor.
Ingredients for capellini pasta salad
Delicate angel-hair strands meet bright vegetables and zesty dressing—no soggy pasta here.
| Ingredient | Amount | Notes |
|---|---|---|
| Capellini Pasta 🍝 | 8 oz | Dried, angel-hair variety |
| Extra-Virgin Olive Oil 🫒 | ¼ cup | For pasta cooking |
| Salt 🧂 | 1 ½ tsp | Kosher or sea salt |
| Ice Cubes ❄️ | 4 cups | For shocking pasta |
| Fresh Lemon Juice 🍋 | ⅓ cup | Freshly squeezed |
| Extra-Virgin Olive Oil 🫒 | ⅓ cup | For dressing (extra-virgin) |
| Fresh Dill 🌿 | ¼ cup | Chopped, fresh preferred |
| Fresh Parsley 🌿 | ¼ cup | Chopped, flat-leaf preferred |
| Garlic Cloves 🧄 | 3 cloves | Minced, fresh preferred |
| Dijon Mustard 🍯 | 1 tbsp | For dressing tang |
| Cherry Tomatoes 🍅 | 1 pint | Halved, vine-ripened |
| Cucumber 🥒 | 1 medium | Peeled, seeded, sliced thin |
| Red Onion 🧅 | ½ medium | Thinly sliced, red preferred |
| Black Pepper 🌶️ | ½ tsp | Freshly ground |
| Grilled Chicken Breast 🍗 | 1 lb | Diced, optional protein |
The capellini is non-negotiable for this recipe—De Cecco or Barilla angel-hair are my go-tos, but any high-quality dried brand works. Look for strands that are uniformly thin and smooth, not fluffy or thick. The ice water shock is what keeps them al dente, so have that ready before boiling. For the vegetables, Heirloom cherry tomatoes add the best flavor, but regular ones work fine. The cucumber should be crisp—English cucumbers stay crunchier longer, but seedless American ones are more widely available. Thinly slice the red onion (about 1/8-inch) so it softens just enough without losing its bite.
No fresh dill? Dried dill at one-third the amount gets you close, but fresh is absolutely essential for that bright flavor. Running short on lemon juice? White wine vinegar or apple cider vinegar works in a pinch, but the acidity will be slightly different. The Dijon mustard adds depth—Maille is my favorite, but any good-quality Dijon works. For the chicken, grill or pan-sear until internal temp hits 165°F, then let it rest before dicing. If you're skipping protein, add white beans or chickpeas for extra substance. The dressing should be emulsified but still pourable—adjust lemon or olive oil to taste.
This salad tastes even better the next day as flavors meld. Store in an airtight container in the fridge for up to 4 days. For meal prep, portion into individual containers so you can grab and go. The dressing separates slightly after chilling—just give it a quick whisk before serving. If the pasta starts to dry out, drizzle with a little extra olive oil. The vegetables will hold their crispness best if you add them to the pasta just before serving, but for make-ahead convenience, toss everything together and store it all.
Why You'll Love This Recipe
- No-Boil Magic: I swear by the ice bath trick—just cook the capellini al dente, plunge it into ice water, then drain. The pasta stays silky and clings to the lemony olive oil dressing like it’s been kissed by the Mediterranean sun. (Yes, even my picky roommate stopped complaining about "dry pasta.")
- Zesty, Not Heavy: That bright lemon juice cuts through the richness of the olive oil, keeping it light yet satisfying. Honestly, it’s the kind of dish where you can taste the difference between store-bought and fresh-squeezed juice—worth the extra 30 seconds to zest that lemon.
- Meal-Prep MVP: Make a big batch on Sunday and it’s ready for picnics, potlucks, or lazy weeknight lunches. Between us, this is the salad I pack for work when I’m tired of sad office snacks. It holds up for days, no sad wilted greens here.
- Budget Brightener: Capellini is cheaper than most pasta shapes, and olive oil stretches further than you’d think when dressed with lemon and salt. I’ll be real: this is how I feed my college-age kids without breaking the bank. (They still ask for seconds, though.)
Step-by-step instructions for perfect angel-hair pasta salad
Here's the foolproof method to create silky capellini that stays al dente while absorbing all those bright, fresh flavors.
Cook the Capellini to Exact Al Dente
Bring a large pot of water to a rolling boil and add the 8 oz capellini pasta along with 1.5 tsp salt. The water should taste like the sea—this ensures proper seasoning throughout the noodles. Cook for exactly 2 minutes less than the package instructions (usually 7-8 minutes total for al dente).
I like to test one noodle at the 6-minute mark by tasting it raw—it should have a slight bite. This early check prevents overcooking. When the pasta reaches 2 minutes before full cook time, drain it immediately and transfer to a large bowl. Here's the secret: add 4 cups ice cubes right to the hot pasta. This shocking method stops the cooking instantly while preserving that perfect texture.
Prepare the Vibrant Herb Dressing
In a separate bowl, whisk together the 0.33 cup extra-virgin olive oil, 0.33 cup fresh lemon juice, 1 tbsp Dijon mustard, 3 minced garlic cloves, 0.5 tsp black pepper, 0.25 cup chopped fresh dill, and 0.25 cup chopped fresh parsley. The dressing should be emulsified and glossy—if it separates, whisk vigorously for another 30 seconds.
Taste and adjust seasoning—this is your flavor foundation. I usually add a pinch more salt here since the grilled chicken will contribute its own seasoning. Let the dressing sit for 5 minutes while you prep the vegetables. This resting time allows the flavors to meld and the mustard to fully incorporate into the emulsion.
Assemble the Crunchy Vegetable Mix
In a large mixing bowl, combine the halved cherry tomatoes, peeled and thinly sliced cucumber, and thinly sliced red onion. Toss gently with 0.25 cup extra-virgin olive oil (the amount reserved for pasta cooking) to prevent the vegetables from releasing too much moisture. The goal is to maintain that crisp texture we're after.
Add the diced grilled chicken breast (if using) and toss again. The chicken should be warm but not hot—if it is, let it cool for 5 minutes first. This prevents the dressing from breaking when combined with the hot protein. Sprinkle with an additional 0.25 cup chopped fresh dill and 0.25 cup chopped fresh parsley for that final fresh herb punch.
Combine Everything for Maximum Flavor
Drain the shocked capellini thoroughly (use a colander or salad spinner) and add it to the vegetable-chicken mixture. Pour the herb dressing over the top and toss gently but thoroughly. The pasta should be evenly coated but still retain its individual strands—overmixing creates a mushy mess.
Let the salad sit for 10 minutes before serving. This resting period allows the flavors to truly meld together. Taste again and adjust seasoning if needed—sometimes the lemon brightens more after sitting, or the vegetables release additional juices that need balancing. The perfect pasta salad should have a balance of silky noodles, crisp vegetables, and a bright, tangy dressing that makes every bite sing.
Pro Tips For Making Capellini Pasta Salad
- BOIL WITH ICE: Toss capellini into salted boiling water, then add ice cubes as soon as you drain—this stops cooking instantly and keeps the strands silky. I used to skip this and ended up with limp, mushy pasta every time. Now it holds shape like fresh fettuccine.
- SALT THE OIL: Mix a pinch of salt into your olive oil before tossing the pasta—it seasons the strands inside the strands, not just on the surface. I learned this after tasting bland capellini that needed extra salt later. Works especially well with lemon juice.
- CUT LEMON THIN: Slice lemon rinds paper-thin (use a peeler or mandoline) and add them whole to the salad—they infuse flavor without bitterness. Whole slices also look prettier than pulp. (Yes, even if you’re impatient like me.)
- DRAIN DRY: Drain capellini in a colander, then shake it vigorously to remove all water—sticky strands clump when even a little moisture lingers. I used to leave it damp, and the salad turned gluey. A quick towel press helps too.
Pro cooking tips for this dish
Shocking Technique
That ice water shock after draining is non-negotiable for perfect capellini. As soon as the pasta reaches 2 minutes before full cook time, drain it immediately and transfer to a bowl with 4 cups ice cubes.
This stops the cooking process instantly, locking in that al dente texture. I use a fine-mesh strainer for draining to remove excess water before shocking—this prevents dilution of the dressing later. 💫
Dressing Emulsion
The secret to a silky dressing lies in proper emulsification. Whisk the extra-virgin olive oil and lemon juice vigorously until completely combined—this creates a stable emulsion that won't separate. I like to add the Dijon mustard first, then slowly drizzle in the oil while whisking continuously.
For extra stability, add 1 tsp honey if you notice separation—it helps bridge the oil and vinegar. Let it rest for 5 minutes before tossing with pasta.
Vegetable Prep
Vegetables are the texture contrast that makes this salad shine. For the cucumber, use a mandoline slicer set to 1/8-inch for even thickness. Pat the slices dry with a paper towel to remove excess moisture—they'll stay crisp longer.
The red onion should be sliced paper-thin (about 1/16-inch) using a sharp chef's knife or mandoline. Toss them with 1 tsp olive oil before adding to the salad to prevent them from absorbing too much dressing.
Protein Timing
If using grilled chicken, let it cool completely before adding to the salad—hot protein can break the dressing emulsion. I like to grill the chicken with 1 tsp smoked paprika and ½ tsp garlic powder for extra flavor.
For a vegetarian option, add ½ cup white beans (rinsed well) or ½ cup crumbled feta cheese just before serving. The beans add heartiness while the feta brings a salty tang that balances the lemon dressing.
Flavor Resting
Never skip the 10-minute resting period after assembling! This allows the dressing to fully coat the pasta and vegetables, while the lemon brightens and the herbs release their full aroma. I often make this salad the night before—flavors meld beautifully in the fridge, and the pasta absorbs even more dressing.
Store in an airtight container with parchment paper between layers to prevent sticking. 💡
Make-Ahead Magic
This salad actually tastes better the next day as flavors develop. For meal prep, assemble completely (including dressing) and store for up to 4 days. Before serving, give it a gentle toss and adjust seasoning—you might need a splash more lemon juice or a pinch of salt.
For extra crunch, add fresh herbs and vegetables just before serving. The ice water trick ensures the pasta stays perfect even after refrigeration. 🌟
Nutrition facts
Frequently asked questions
Why does capellini turn mushy in pasta salad?
Angel-hair pasta absorbs moisture quickly, which is why most recipes fail. The key is cooking it 2 minutes less than package instructions, then shocking it in ice water immediately after draining. This stops the cooking process and preserves that delicate, silky texture. Never rinse capellini after cooking—it removes the starch needed for the dressing to cling!
Can I make this salad without chicken?
For a vegetarian version, add ½ cup white beans (rinsed) or ½ cup crumbled feta cheese just before serving. The beans add heartiness while the feta brings a salty tang that balances the lemon dressing beautifully. You could also include grilled shrimp or avocado chunks for extra richness.
How do I prevent the dressing from separating?
Emulsify properly by whisking the extra-virgin olive oil and lemon juice vigorously until completely combined. Add Dijon mustard first, then slowly drizzle in the oil while whisking continuously. For extra stability, add 1 tsp honey if you notice separation. Let the dressing rest for 5 minutes before tossing with pasta to allow flavors to meld.
Can I use whole wheat capellini?
Whole wheat angel-hair works, but it cooks faster and absorbs more moisture, making it slightly more prone to sogginess. Cook it for 1 minute less than regular capellini and increase the ice water shock to 5 cups to halt cooking completely. The texture will be heartier but less delicate—great for those who prefer a nuttier flavor and extra fiber!
What's the best way to store leftovers?
Store in an airtight container with parchment paper between layers to prevent sticking. This salad keeps well in the fridge for up to 4 days. Before serving, give it a gentle toss and adjust seasoning—you might need a splash more lemon juice or a pinch of salt. For extra crunch, add fresh herbs and vegetables just before serving.